ENTER YOUR EMAIL HERE FOR MY TELESCOPE BUYING GUIDE
My ISS transit shots tend to get the most questions, so I put together a write-up of exactly how I get them.
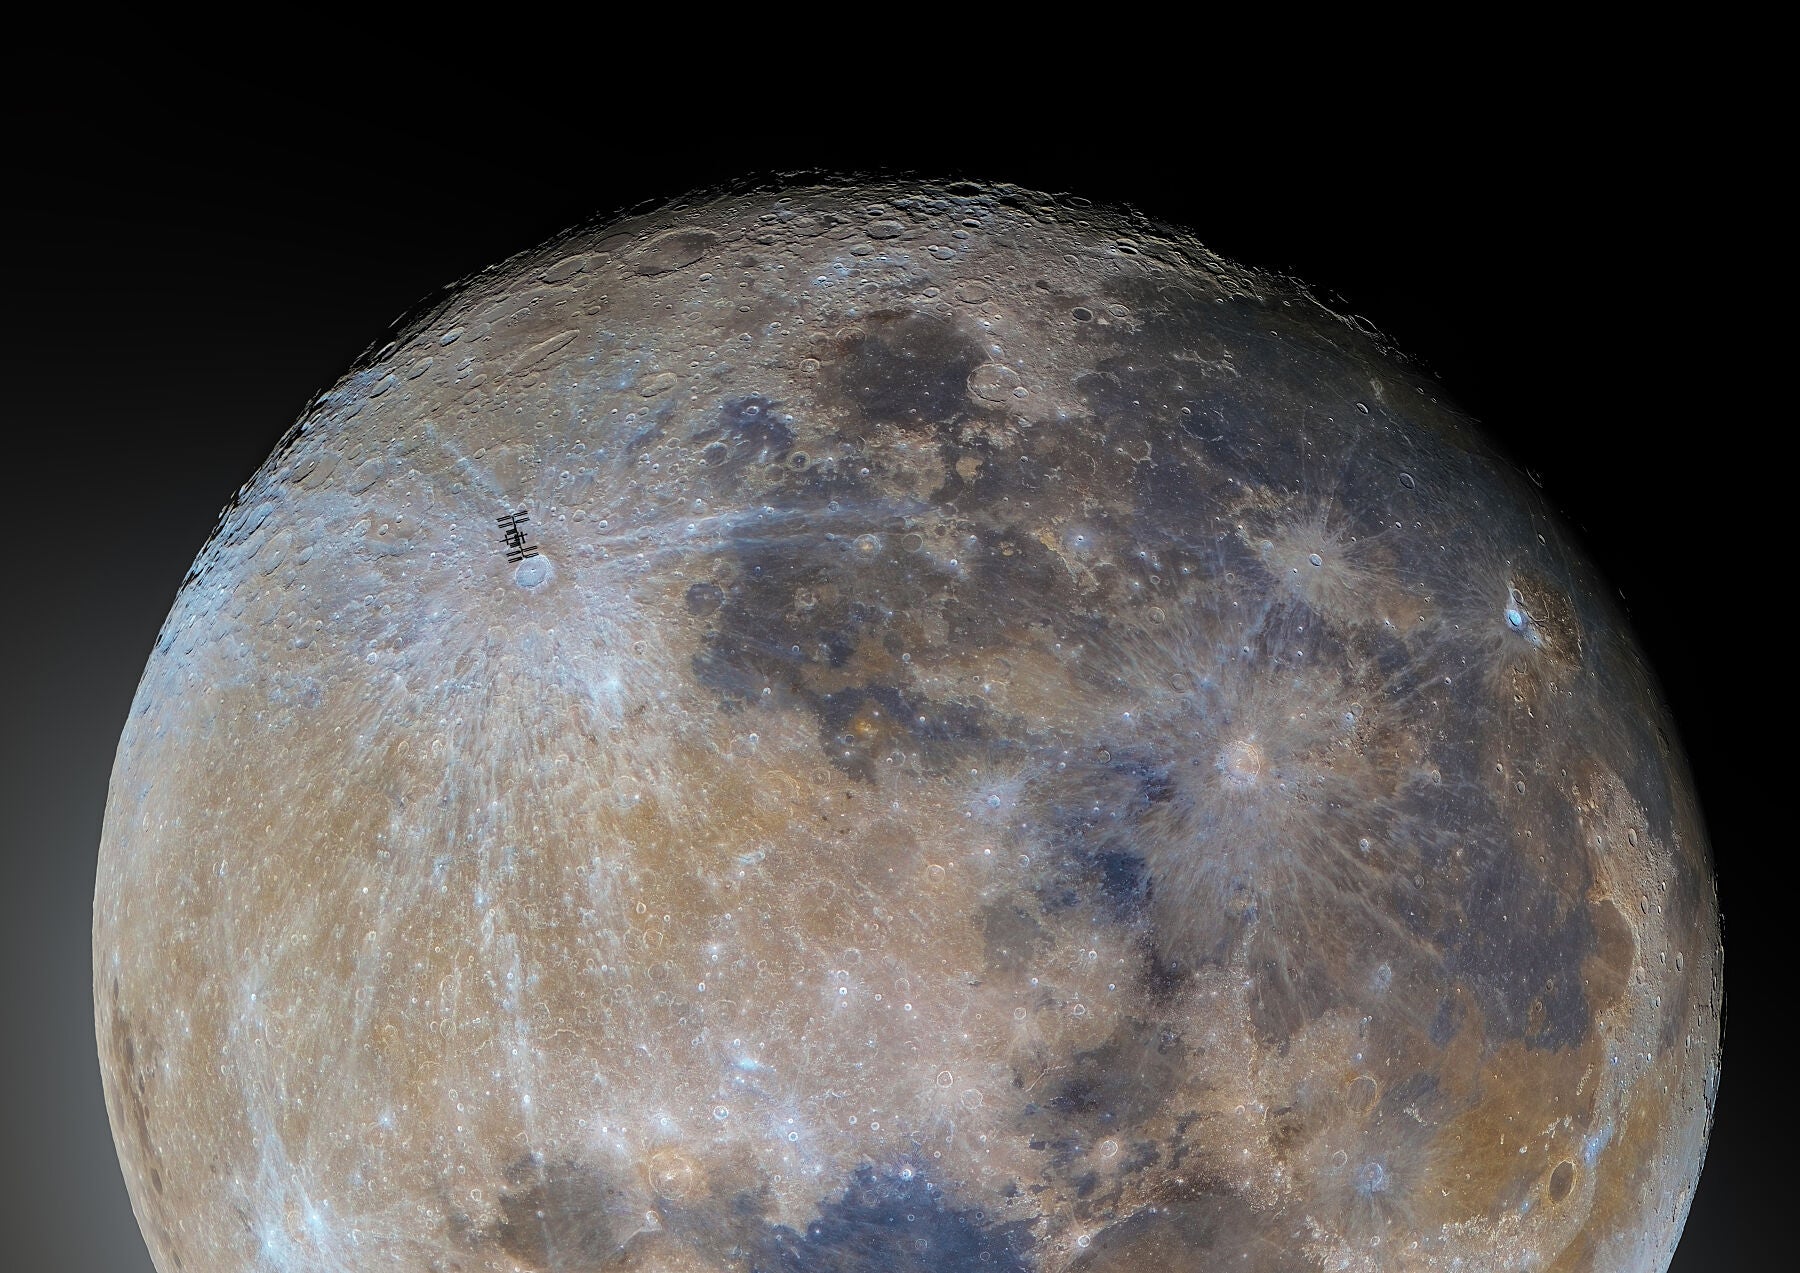
See the uncropped version of my latest ISS Transit shot here (you can order print there as well, get some cool space art while supporting my projects)
First- I check transit-finder.com.
This is a web resource that allows you to put in your location, a time frame, and how far you're willing to drive, and it will spit out results of nearby transits. I check this every week, and see my transits coming about a month ahead of time. The results can change though based on updated ISS trajectories though, so check it often. The results generally look like this:
![]()
This gives me information about the upcoming transits, so I'll know how good they are. The arrow shows path of travel from your current location, but if you travel the distance indicated towards the path of the transit you will be able to capture it. Many of the results will be far too small to resolve details on the ISS, so I generally skip those ones. "ISS angular size" is one of the only details that matters. I generally only shoot ones that are over 45", but some photographers have captured great ones that are smaller. If it is nearly straight overhead, it is larger since that is when it is closest. That second transit in that image is the best one, but it is also fairly far away at 31km. Still though, 62" (that's arcseconds) is about as "big" as the Iss gets for these, I've only seen a couple larger than that.
Next, I would plan the gear for my shot.
I am lucky to have a lot of good equipment at my fingertips, but really you just need a camera with a fairly long focal length. I recommend at least 800mm, but the more the better (so long as your f# doesn't get so high you have to increase exposure time). I have actually captured transits with a 350mm lens where I was still able to resolve the solar panels, so don't let your lack of equipment necessarily deter you! If it's a solar transit, you can get solar filters for cheap that block enough light to safely shoot the transit. It won't show solar atmospheric details like my solar scope, but it'll be good enough to see the clear silhouette. A tracking mount helps you keep it in frame, but since the transit itself is so short it is technically unnecessary. A remote shutter/intervalometer is highly recommended. Definitely use a tripod.
Then- scout the location.
If you are travelling to the shooting location, make sure there is a public spot with enough room to set up your camera. I generally do this the day before the transit so I can check the site again and make sure the ISS didn't change positions.
Set up early
I generally show up at least an hour early to these, sometimes several hours early. This gives me time to double check the ISS hasn't changed paths (again, via transit-finder.com) and test my equipment.
Prepping for the shot
Once I have my gear set up and pointed at the moon/sun (with appropriate filters) I test my equipment. These transits are always less than a second, so making sure the camera is able to take frames as quickly as possible ensures you are ready when the time comes. Also, take this time to focus on the subject, and take test frames. Always shoot with the lowest ISO/Gain possible, but keep exposure length at no longer than 1ms or 1/1000s. Any longer and the ISS starts to show motion blur. Make sure you're on a continuous shooting mode in RAW. Take test shots to see how fast your camera can shoot, for about 20 seconds. (Note- having a memory card with the fastest write speed is paramount here) Have a clock with seconds counting visible. I use my laptop with time.gov running so I know the time is accurate to the millisecond. Frame your target with enough margin for error that if the ISS passes above or below the expected trajectory it is still in frame. I find it is generally within a few arc minutes of the expected path, but have seen many that missed by up to 10 arc minutes (1/6 a degree, or about a third the width of the moon/sun).
Start shooting Early, and Keep shooting after the pass
You probably won't actually see the pass, unless you have a laptop showing a live view through the lens. You'll just have to trust your clock and the pass information to know it happened. For this reason, I always start shooting 5-10 seconds early, and keep shooting for at least 10 seconds after the event. The ISS is almost never exactly on time based on my information, so this allows you some margin of error. If your camera does not record shots quickly enough, I would recommend doing this with a high resolution video instead.
Check your frames to see if you caught it!
This is always the exciting part... seeing it in your camera after the pass! If you missed it, don't worry, it happens to everyone. I've missed several despite doing everything right.

This is my result from the first transit listed on that list. Not bad!
Make sure you sign up for emails (bottom of this page) to learn more about the work that goes into these shots! There's a free telescope buying guide in it for you if you do!